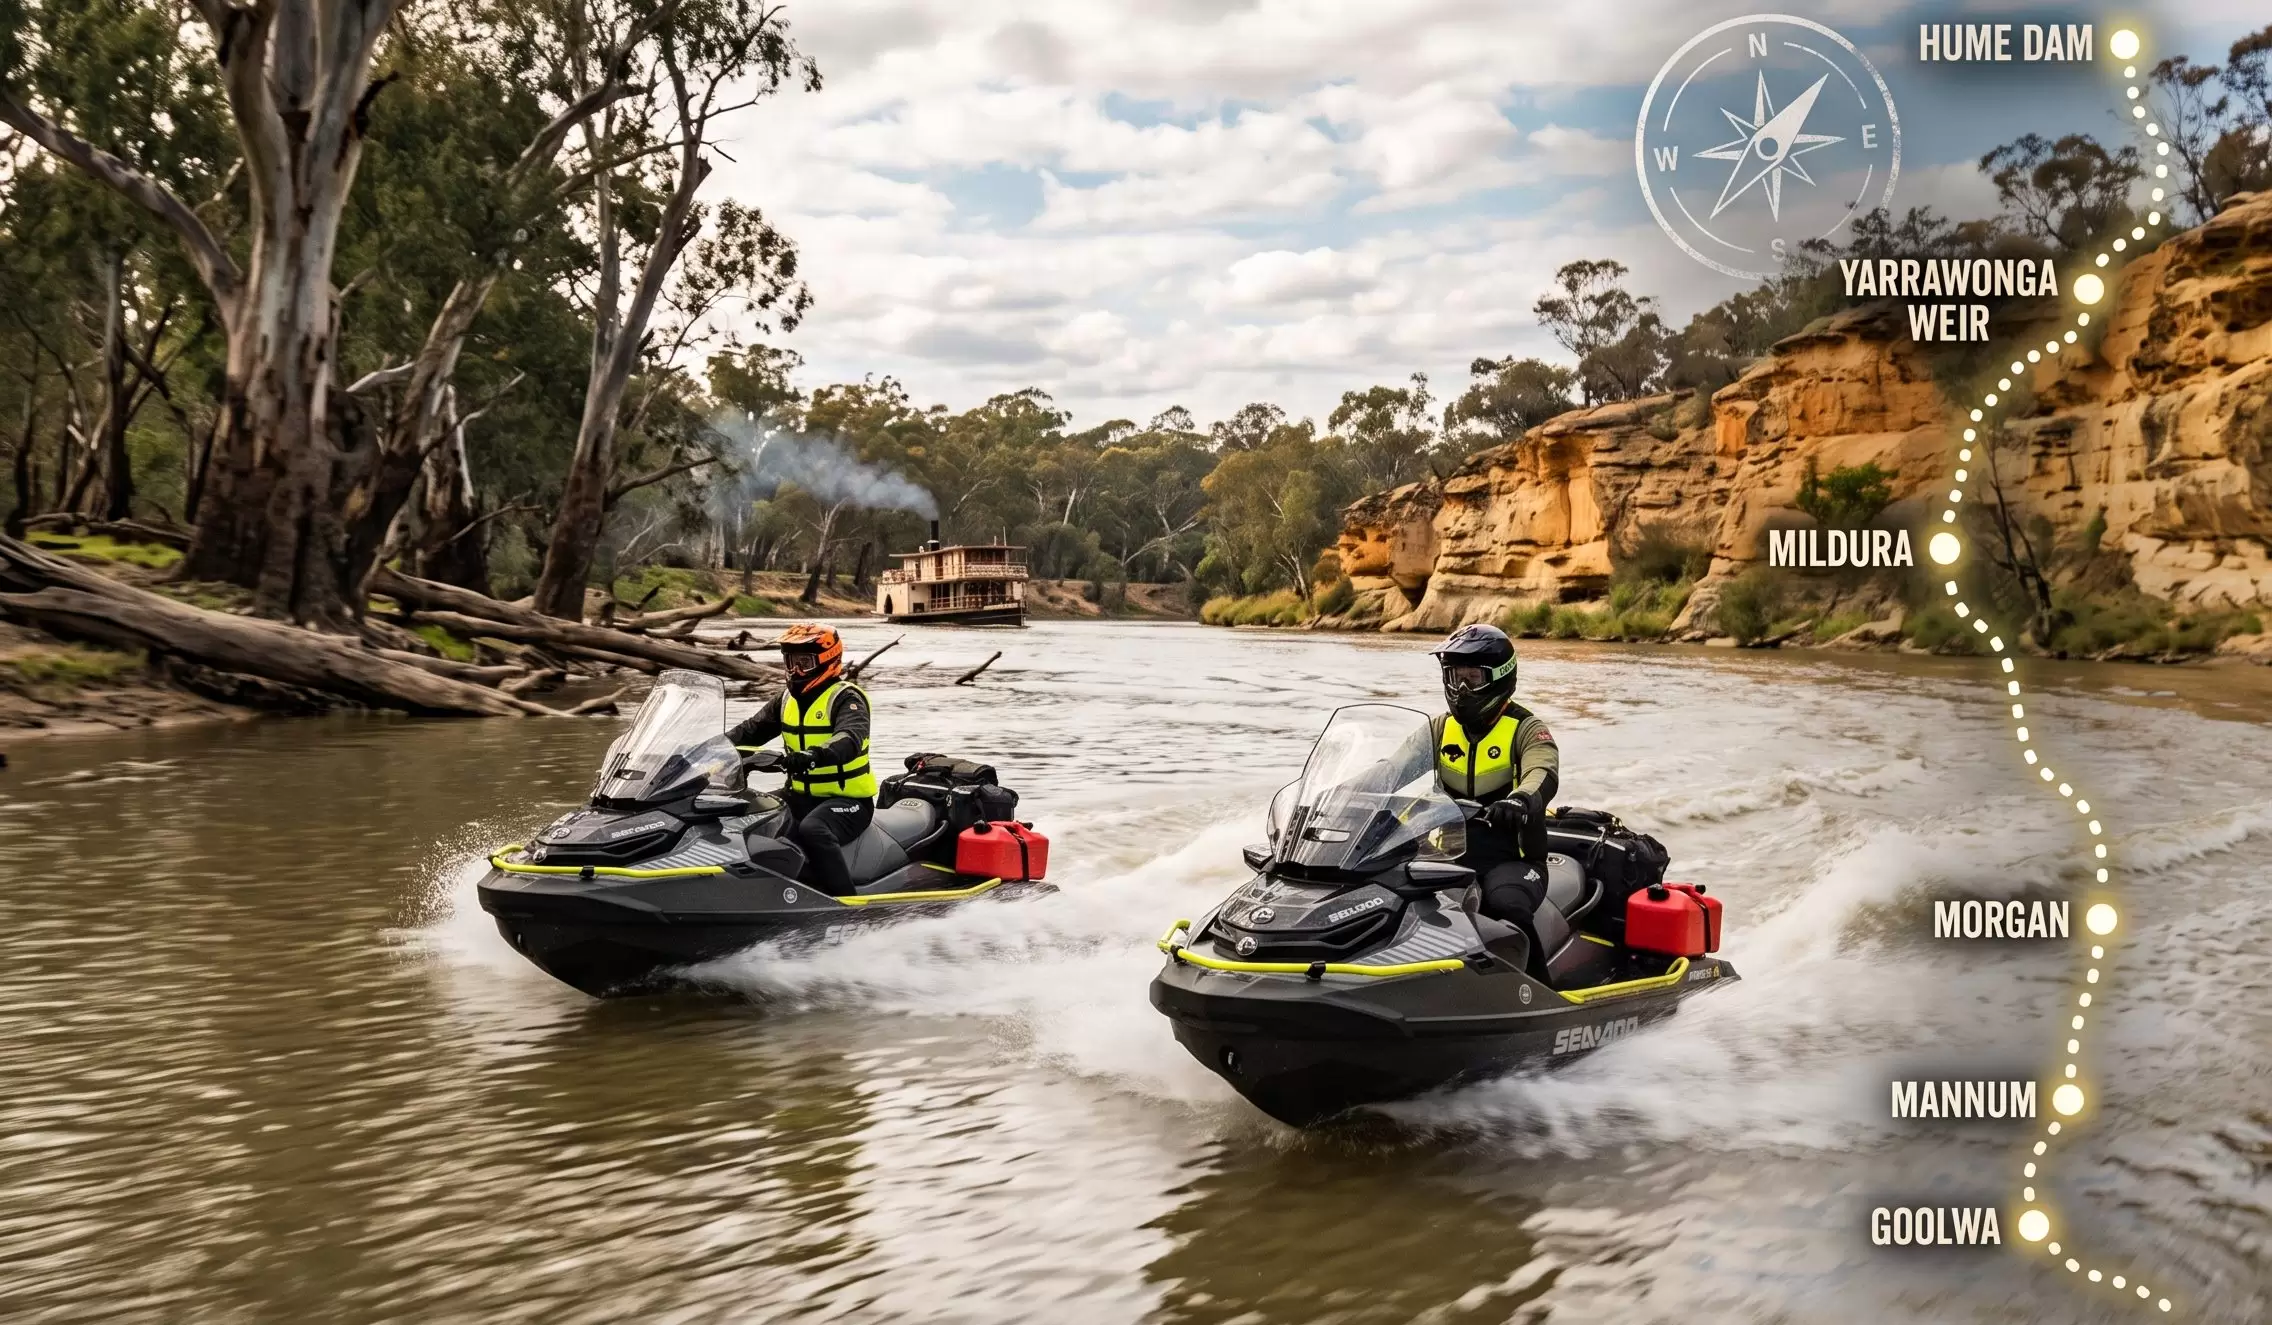
From the shadow of the Snowy Mountains to the windswept breakers of the Southern Ocean, the Murray River is Australia’s great liquid highway—a winding ribbon of ancient red gum forests, soaring ochre cliffs, and frontier history.
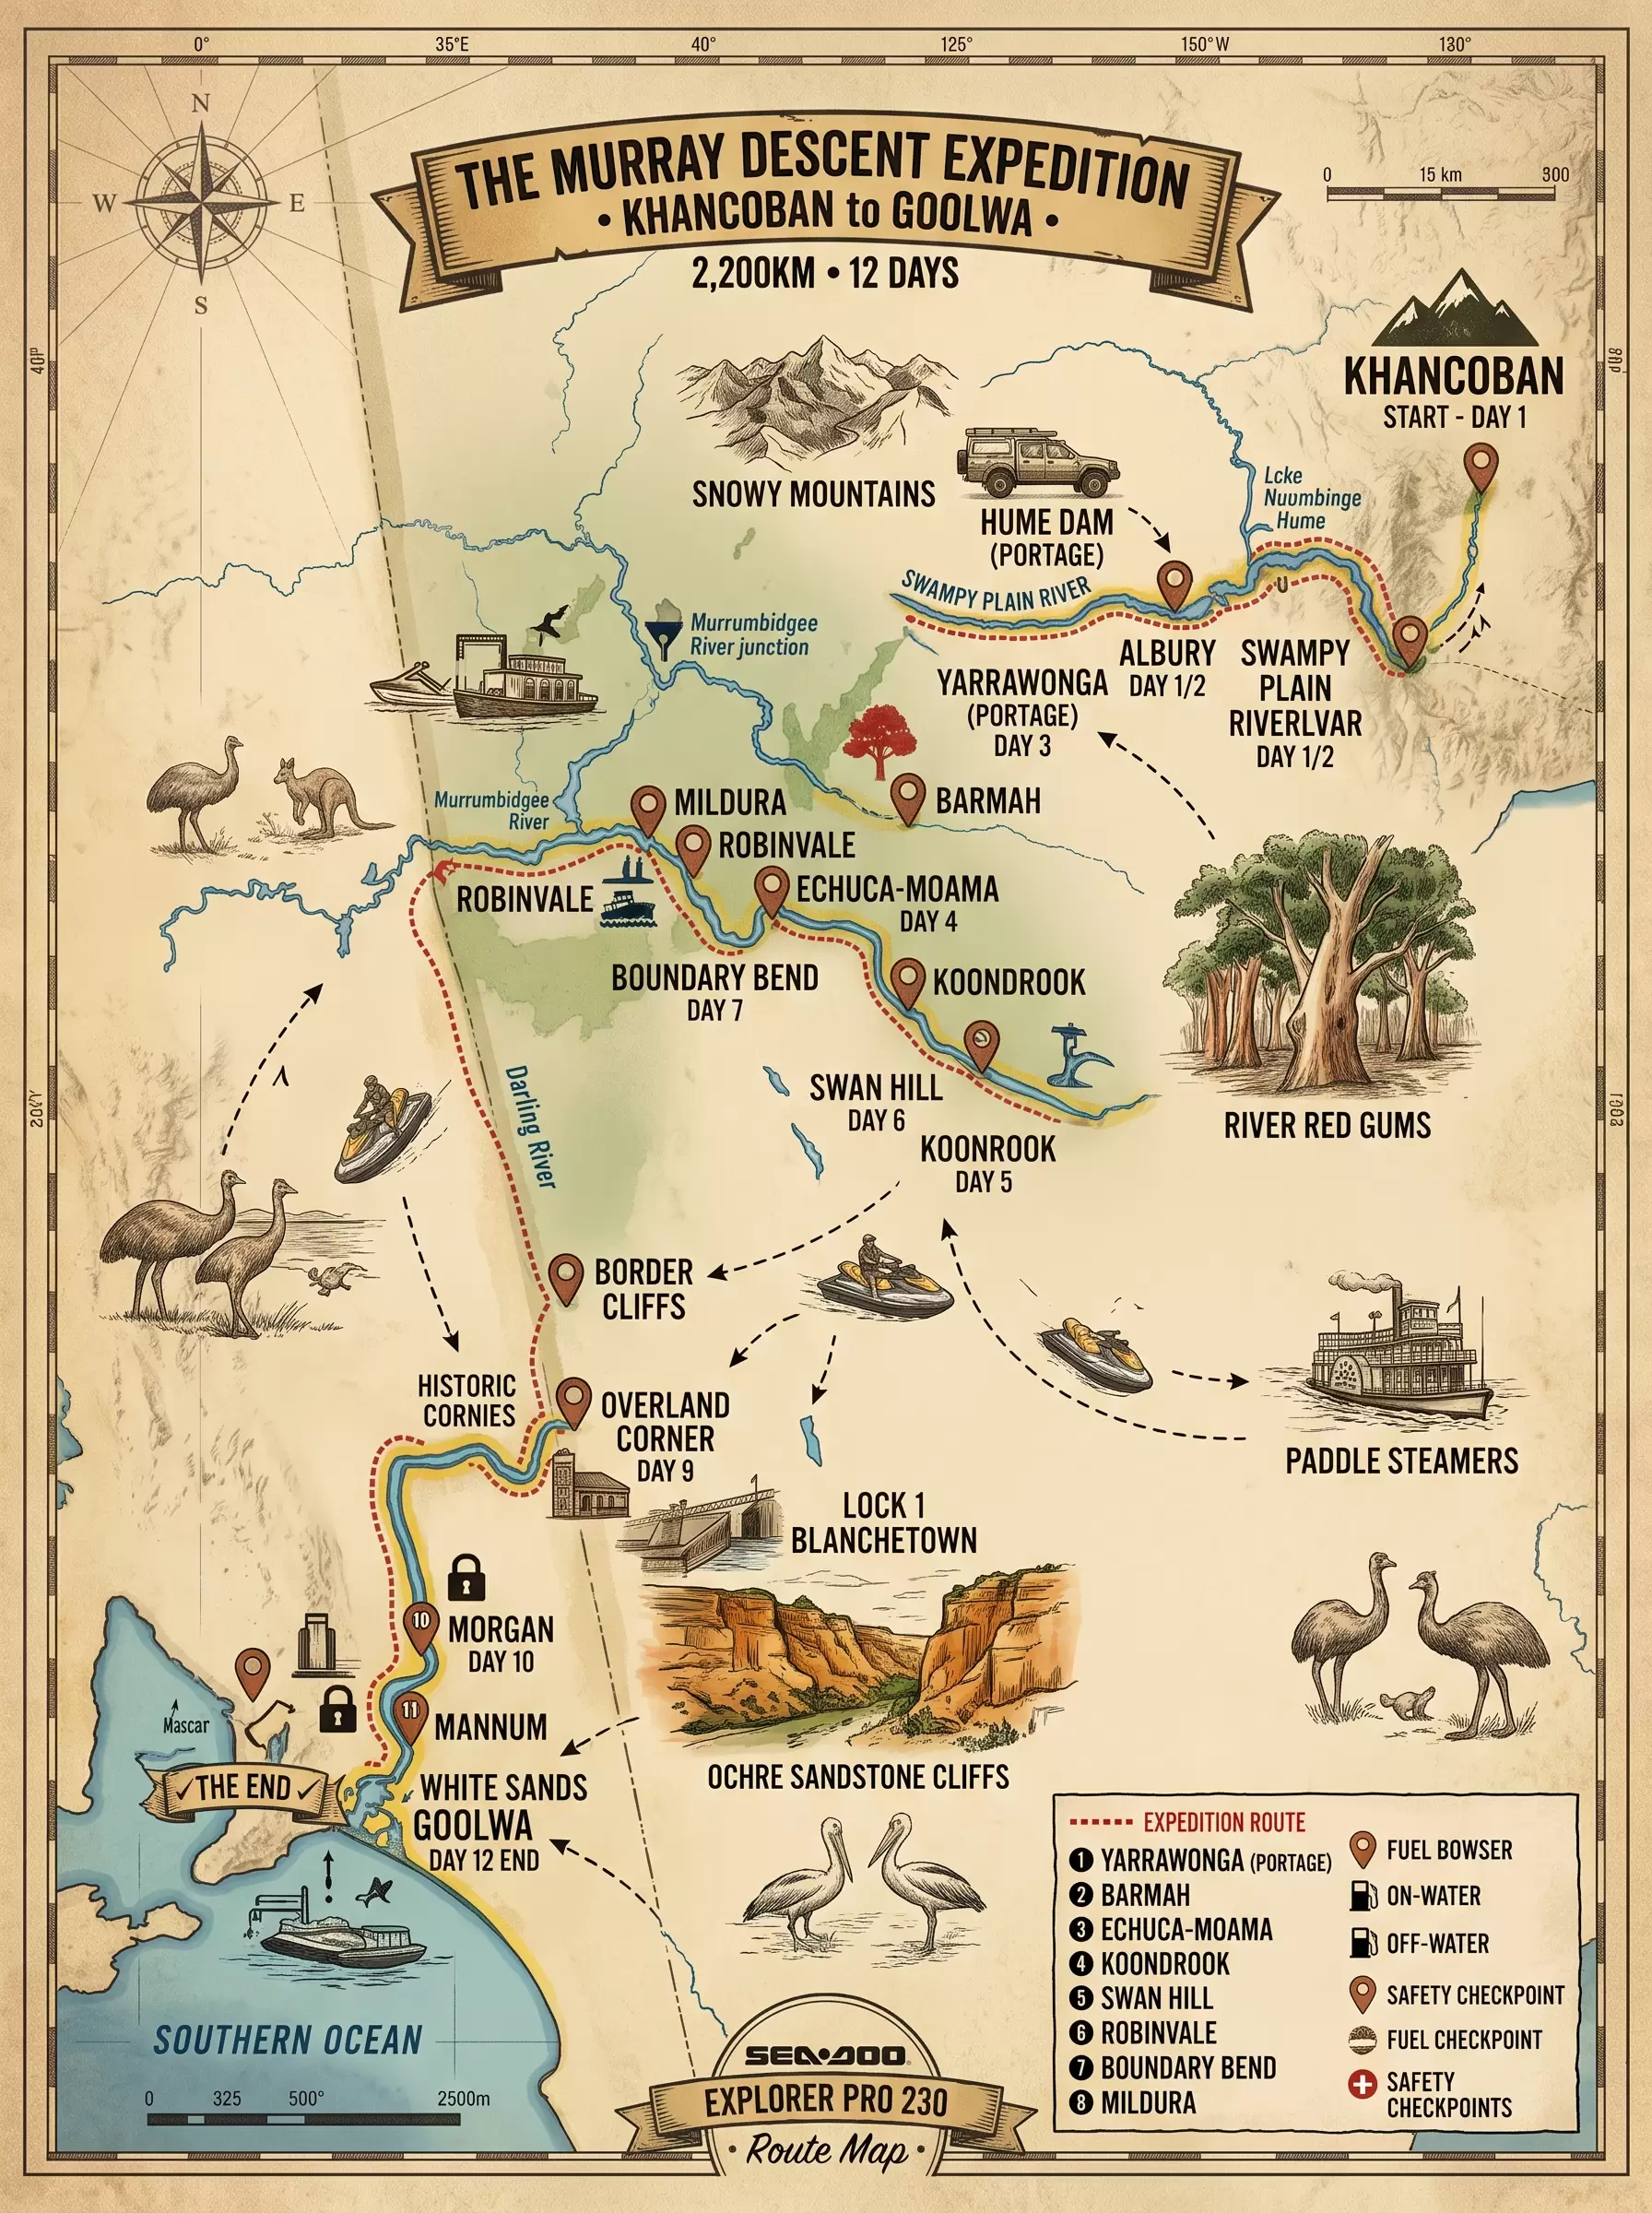
Launching from the alpine foothills at Khancoban and carving our way to the mouth of the river at Goolwa, we are taking on the ultimate endurance ride: a 12-day, 2,200-kilometre expedition navigating the entire length of the navigable Murray aboard 2026 Sea-Doo Explorer Pro 230 watercraft.
Covering over 200 kilometres a day through snags, locks, and sweeping river bends demands serious machinery. Loaded with extended-range LinQ auxiliary fuel caddies pushing onboard capacity to 140-160 litres, heavy-duty touring gear, and debris-clearing pump tech, the Explorer Pros are outfitted as true off-road overland vessels of the water.
With twin portages around the monumental faces of Hume Dam and Yarrawonga Weir coordinated with our support crew, the remaining stretch goes unsupported and unlocks hundreds of kilometres of raw, continuous navigation.
The Upper Churn: Dropping into the fast-flowing Swampy Plain River, tracing the river’s youth through rolling foothill country before the vast expanse of Lake Hume.
The Living Forests: Threading the needle through the narrow bends of the Barmah Choke, riding beneath the towering canopy of the world’s largest river red gum forest.
The River Ports & Frontiers: Cruising past historic paddle steamer hubs like Echuca-Moama, cutting across remote floodplains through Gunbower, Tooleybuc, and Robinvale, down to the sun-baked citrus capital of Mildura.
The Canyon Country: Crossing the South Australian border into a dramatic landscape of towering amber limestone cliffs, weaving through an intricate maze of backwaters, creeks, and historic locks from Chowilla to Overland Corner.
The Final Run: Powering through the broad lower lakes—past Mannum and White Sands—before arriving where Australia’s greatest river meets the ocean at Goolwa.
This isn’t just a scenic cruise—it’s an expedition of endurance, precision, and logistically tight navigation. It means managing fuel ranges across remote stretches, reading ever-shifting sandbars and submerged timber, pacing lock schedules, and setting up camp by riverbanks steeped in Indigenous heritage and bush folklore.
Follow the journey as we document every kilometre, lock, and sunrise along Australia’s greatest water adventure.
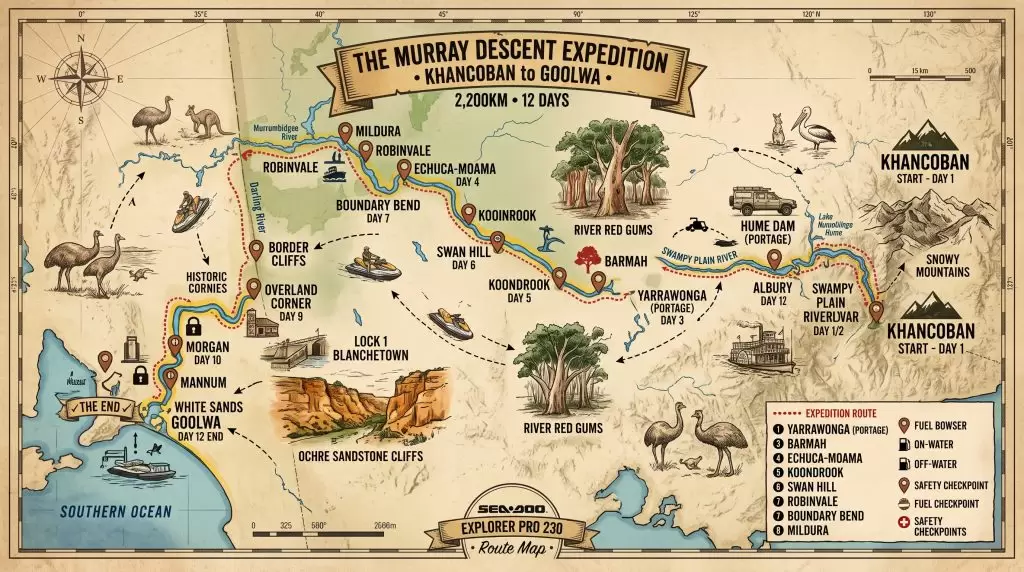
This itinerary outlines a continuous river navigation plan, travelling from Khancoban to Goolwa. Based on the vessel’s fuel capacity (70L standard + 70-90L auxiliary = 140L total), the maximum safe range is approximately 300 km under smooth cruising conditions.
To keep daily travel under the 240 km maximum limit, the journey will be approx 12 days.
Route: Launch at Khancoban on the Swampy Plain River, entering the fast-flowing Upper Murray down to Lake Hume
Route: Put in downstream of Hume Dam at Albury (River Marker 2094 km) and navigate the winding river to Yarrawonga (Marker 1910 km)
Route: Launch below Yarrawonga Weir and traverse the narrow Barmah Choke, finishing the day at Barmah (Marker 1691 km)
Route: This is the longest leg of the trip. You will pass Moama (Marker 1660 km) and navigate through Torrumbarry Weir (Lock 26)
Route: Launch below Yarrawonga Weir and traverse the narrow Barmah Choke, finishing the day at Barmah (Marker 1691 km)
Route: Launch below Yarrawonga Weir and traverse the narrow Barmah Choke, finishing the day at Barmah (Marker 1691 km)
Route: Launch below Yarrawonga Weir and traverse the narrow Barmah Choke, finishing the day at Barmah (Marker 1691 km)